If you cannot find a bag you like or just can't drop $150+ on a new bag then I definitely recommend making a bag yourself. This is my first tutorial so hopefully I give you enough information. If not please email me or leave a comment! We made all the inserts in about 2 hours while watching TV so you could probably finish it quicker if you aren't as easily distracted as me and Hubs.
Supplies:
Bag: I used the Coach Hippie Parker (not available now but the madison hippie is close to it) that I already own. I love this bag because it sits comfortably under my arm and I have the option to wear it across the body. When I was looking for bags I really liked the messenger style but wanted the option to wear it like a regular purse as well - the hippie was perfect!
2. Regular Density Foam
I bought 2 pads from Jo Anne's Fabric and only ended up using 1. They are less than $5.00
3. Scissors
4. Needle and thread
5. 1 Yard of your choice of fabric
1. Measure the width of your bag
Most people use a measuring tape or ruler or some form of measuring tool. Not us - Hubs eyeballed how tall and wide the sides would need to be. I wanted the foam to come up pretty high but still be able to use my inside pockets.
2. Cut the foam to fit
Once we cut one piece of foam we inserted it into the bag to make sure it came high enough to cushion my camera with the lens attached but low enough to keep the pockets accessible. We cut 3 pieces: 2 sides and the bottom. I had enough left over to make the divider as well.
3. Cut the fabric to fit each insert.
We laid the piece of foam on the fabric and used that as a guide.
4. Start sewing!
We turned the fabric inside-out and actually started with the foam insert in the fabric. This helped keep the stitches straight and close to the foam. You want your fabric to be pretty tight around the foam so it looks nice and clean. Again, this is the FIRST time I sewed anything and didn't have any problems. And besides, since you're sewing it inside-out nobody will see if your stitches are straight anyway :)
4. Close it up!
Once you have 2 of the edges sewn together flip the fabric right side out and insert the foam. Now just sew up that last seam and your all finished with 1 of 4 inserts. Good work!
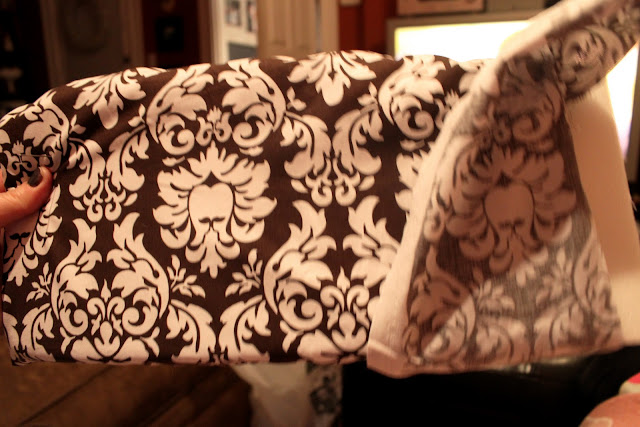
This is what you should end up with - the 2 side walls and the piece for the bottom. I also made a divider with the leftover foam but forgot to put that in the picture. My bad!
6. Place all the inserts into your bag
I stuffed all three inserts in and voila, a new, custom camera bag! I did not have to attach the inserts to each other - some people do but my bag is so tight that the foam actually keeps itself in place. You could also add velcro for the divider but again, it stays in place in my bag.
And here you go! I am IN LOVE with this bag! It is just perfect for me. It will hold my camera with the lens attached and has the divider to separate my wallet or future lenses. It also has the large outside pocket and 3 inside pockets for my phone, lip gloss, etc. I can't wait to tote it around Vegas next week!
With my camera, wallet and cell phone. Pics aren't so fabulous - clearly I was using a sub-par camera ;)
And here it is on me!
Messenger Style:
{sorry the mirror is so dirty! I cleaned it right after I saw this pic!}
Traditional Shoulder Strap:
{Nice Face! apparently I concentrate really hard when I take a pic!}
So there you go - my super fabulous custom DSLR camera bag. Whatcha think??


Great tutorial! I will definitely share this with my readers as I'm sure other women want to use one of their fav handbags as a dslr camera bag!
ReplyDeletewww.stylishdslrcamerabags.com
WOW...I LOVE it! Great job!!!!
ReplyDeleteI've been searching online for the perfect camera purse, but just cant find one that i really like for how expensive they are. I've been thinking of making my own. I think I'm going to try it!
ReplyDeleteThank you for sharing! I was just searching for something like this for my messenger bag!!! LOVE your purse :)
ReplyDeleteI just saw this on pinterest! I bought the foam from walmart, and i'm hoping to make something just like this! you sewed this by hand? why did I not think of that, lol! I was also thinking fabric glue, but would be afraid it would somehow mess up my camera...
ReplyDeleteWhen your website or blog goes live for the first time, it is exciting. That is until you realize no one but you and your. spy camera
ReplyDelete